Register for GRE Test is simple only when every field, ID, and test choice lines up with what ETS expects. A mismatch in your passport name, an expired ID, or choosing the wrong delivery mode can make ETS cancel your slot and keep the fee. [ Source: ETS. (ETS) ]
This page gives you a single, printable, consultant-friendly checklist that follows the same order as the ETS site. It starts before you even log in, so you don’t waste attempts or pay the ₹ 5,000 reschedule/change-center fee later. [ Source: ETS. (ETS) ]
Last updated: Nov 2025

Table of Contents
- 1. Why This 17-Step Checklist Prevents Costly Mistakes
- 2. Phase 1 – The Pre-Check (Before You Log In)
- 3. Phase 2 – Create/Verify Your ETS Account Without Name Errors
- 4. Phase 3 – Search Strategy for Dates, Centers, and At Home Slots
- 5. Phase 4 – Add-Ons, Free Score Recipients & What to Skip
- 6. Phase 5 – After-Registration Safeguards & Day-Of Proofs
- 7. Print, Share, and Train Your Students/Advisees
- 8. FAQs
Contents


Why This 17-Step Checklist Prevents Costly Mistakes
ETS is strict about name matching and valid ID. If the name in your ETS account and the name on the ID you bring to the test center are not the same (minus accents), ETS can cancel the appointment and you lose the entire test fee. [ Source: ETS. (ETS) ]
The same thing can happen if you try to test in a country different from your citizenship and you show anything other than a valid passport with photo and signature. There are no exceptions to this rule, so the only safe path is to check your ID first and create the ETS account second. [ Source: ETS. (ETS) ]
This sequence also stops another common waste of money: paying, then realizing you should have selected your four free score recipients at checkout. ETS gives you four free reports on test day, but extra score reports later cost money, so this checklist makes you pick them at the right moment. [ Source: ETS. (ETS) ]
This step-by-step format matches how registration-focused content is taught in your Linkreator research.
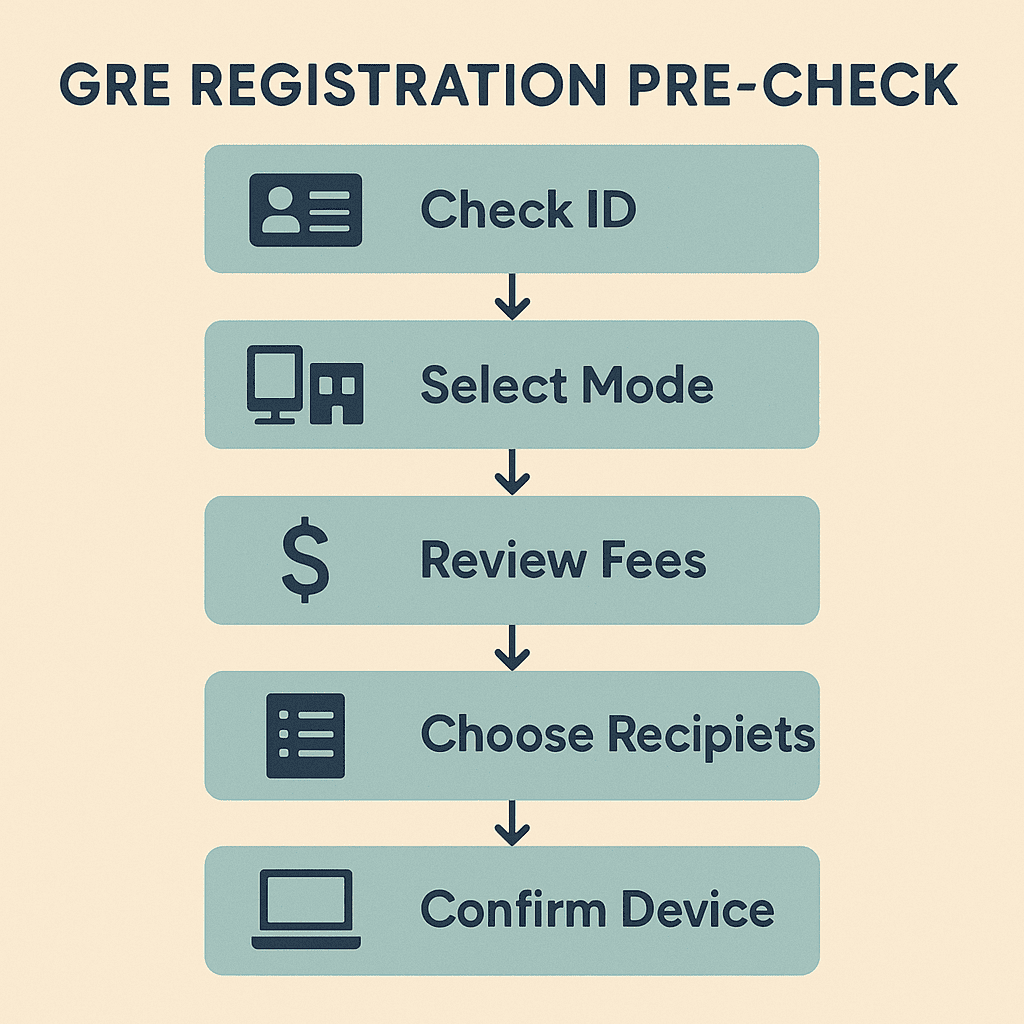
Phase 1 – The Pre-Check (Before You Log In)
Do this part even if you are a counselor filling it out for a student. It saves rework later and it is the part most university career centers want in printable PDF form.
Goal: confirm that the person who will sit for the GRE has a valid ID, knows where they will test, and has a clean browser/device if they pick the at home option.
Step 1: Confirm the ID You Will Use on Test Day
Ask: “What ID will you bring?” If the answer is anything other than a government-issued passport or national ID that meets ETS rules, pause and fix it first. ETS says the ID must be original, physical, valid, and must include name, photo, and signature, and the name must match the account. Photocopies and digital IDs are not allowed. [ Source: ETS. (ETS) ]
- If you will test in the country of your citizenship: a current, government-issued national ID or passport is usually enough (see ETS table for your country).
- If you will test outside your country of citizenship: use your valid passport with photo and signature. ETS says there are no exceptions. [ Source: ETS. (ETS) ]
- If your ID has recently changed names: collect legal name-change proof now so the name you enter matches what you show on test day. [ Source: Yocket. (Yocket) ]
Step 2: Decide “Test Center” vs “At Home” Before You Open ETS
ETS lets you take the GRE at a test center or at home, but the at home version has extra equipment, camera, and room scan requirements, and you can’t wear headsets. Deciding first means you can prepare the right device and you won’t be surprised during registration. [ Source: ETS. (ETS) ]
- Choose Test Center if: your room is noisy, your internet is shared, or you do not have a movable webcam to show a 360° view to the proctor. [ Source: ETS. (ETS) ]
- Choose At Home if: you have a desktop/laptop, Chrome/Firefox, internal/external speaker, a separate mic, and a camera that can show the room and desk. Headsets and earphones are not allowed. [ Source: ETS. (ETS) ]
- For counselors: write the choice on top of the student’s checklist so whoever completes registration later sticks to it.
Step 3: Check the Current GRE Fee and Reschedule Fee in Your Region
Pick the exact country page for fees and note it on the printed sheet. In India, ETS currently lists a rescheduling or test center change fee of ₹ 5,000, so choosing the wrong date or wrong center can be expensive. [ Source: ETS. (ETS) ]
- Write down: current test fee for your country/region (general test).
- Write down: rescheduling/test center change fee so the student knows not to pick a random date. [ Source: Shiksha. (Shiksha) ]
- Tell the student: “Once we pay, we don’t get this back if we violate ETS name/ID rules.” [ Source: ETS. (ETS) ]
Step 4: Prepare a 4-Recipient List for Free Score Reports
On test day ETS lets you send scores to up to four approved recipients free. You can also send after test day for a fee, but this checklist wants you to talk to your counselor or parent now, so those four are ready. [ Source: ETS. (ETS) ]
- Collect program names: universities, fellowships, or departments from the ETS approved list. [ Source: ETS. (ETS) ]
- Rank them: top 4 you are sure about → list them on the printable sheet.
- Note for future: additional score reports later cost money, so keeping this list with your registration printout saves calls later. [ Source: ETS. (ETS) ]
Step 5: If At Home, Do the Device/Browser Check Before Registration
The ETS secure browser, camera test, and ProctorU equipment check sometimes fail because of firewall or office laptops. Doing the check now means you don’t book a slot and then discover your laptop is blocked. [ Source: Shiksha. (Shiksha) ]
- Download the ETS secure test browser on the device you will actually use.
- Run the equipment test and verify camera can rotate to show the room.
- Make sure the room you will test in is quiet, well lit, and has a clear table, because the proctor will ask you to show it. [ Source: ETS. (ETS) ]
Phase 2 – Create/Verify Your ETS Account Without Name Errors
Only after Phase 1 is clean should you open the ETS site and create or edit the account. This is the step where most students type a nickname or add an extra initial that is not on the passport. ETS warns that if inconsistent registration information is spotted, the appointment can be canceled and fees forfeited. [ Source: ETS. (ETS) ]
You will now copy the name exactly as it appears on the ID you decided to bring. Do not “fix” spellings, do not reorder components, and do not add hyphens or titles your ID does not have.
Step 6: Go to the Official ETS GRE Registration Page
Use the official ETS domain and bookmark it. Many blogs and coaching sites repost registration steps, but you must create the account only at ETS because that is where the test day ticket and scores will appear. [ Source: IMS India. (IMS India) ]
- Open https://www.ets.org/gre/test-takers/general-test/register.html.
- Click “ETS Account” or “Sign In / Create Account.”
- Keep your ID open next to you.
Only after Phase 1 is clean should you open the ETS site and create or edit the account. This is the step where most students type a nickname or add an extra initial that is not on the passport. ETS warns that if inconsistent registration information is spotted, the appointment can be canceled and fees forfeited. [ Source: ETS. (ETS) ]
You will now copy the name exactly as it appears on the ID you decided to bring. Do not “fix” spellings, do not reorder components, and do not add hyphens or titles your ID does not have. Your ETS account is the system that will later let you view/change your test, buy prep, and send score reports. [ Source: ETS. (ETS) ]
Step 6: Go to the Official ETS GRE Registration Page (Sign In / Create Account)
Use only the official ETS domain. This is partly to avoid fake lookalike sites and partly to ensure your account is tied to the correct test services. The same ETS account can be used for GRE and TOEFL, so if you already took TOEFL, you can sign in and activate GRE from the same credentials. [ Source: ETS login. (ETS) ]
- Visit the GRE registration page or directly open the sign-in portal at ereg.ets.org. [ Source: ETS. (ETS) ]
- Click “Create an account” if you are new, or “Sign In” if you already have ETS credentials.
- Keep the ID you selected in Phase 1 open on your table so you don’t guess the spelling.
Step 7: Enter Your Name EXACTLY as in Your Passport/ID
This field is the number one cause of canceled appointments. ETS explicitly says your first/given name and last/family name in the account must match the ID you bring on test day. Middle name or patronymic rules vary by country, so the safest method is to copy every name element that appears on the ID into the matching field, in the same order. [ Source: ETS ID Requirements. (ETS) ]
- Copy–don’t type from memory. If your passport says “PRIYA LAKSHMI KUMAR”, that is what must go in your ETS name fields.
- Do not add titles (Dr., Mr., Ms.) and do not remove accents if your ID has them; ETS will decide what is acceptable.
- If your name changed (marriage/divorce), contact ETS before test day and carry legal proof, because name mismatch can stop you from testing even if you arrive on time. [ Source: ETS ID Requirements. (ETS) ]
Step 8: Fill in Contact, Country, and Communication Fields Carefully
Why this matters: your country setting affects which test centers, test dates, and fees you see. If you pick the wrong country or region, you may think a date is unavailable or you may see a test center that is not actually in your city. Your email and mobile contact are also what ETS uses for change/cancel notifications. [ Source: ETS – Your ETS Account. (ETS) ]
- Use an email you actually check, not a college alias that expires.
- Enter a mobile number that can receive messages on the day of test (important for at home).
- Set the right country so the fee page and permitted IDs match the right rule set. [ Source: ETS Fees. (ETS) ]
Step 9: Turn On Access to Other ETS Services You Will Actually Use
While you are in the account, ETS lets you sign up for GRE Search Service, purchase prep, and later view your scores from the same dashboard. Turning this on now means you don’t have to recover your account or re-verify email later. [ Source: ETS – Your ETS Account. (ETS) ]
- Enable score notifications so you get an email when your official score is posted.
- Save your login method (password manager) so you can reschedule/change test centers yourself.
- If you need accommodations, note that ETS handles this through the account too, but you must apply early. [ Source: ETS. (ETS) ]

Step 10: Log Out and Log Back In Once
This sounds small, but it confirms the account was created, the email was accepted, and your browser is saving the session correctly. If you are a counselor creating accounts for multiple students, this is the fastest way to verify the account is “real” before you start the center/date search in the next phase.
- Click Sign Out or close the tab.
- Open ereg.ets.org again.
- Sign back in with the same email and password to ensure it works and shows GRE on the dashboard. [ Source: ETS Sign In. (ETS) ]
When these 10 steps are done, you now have a clean ETS account whose name matches the ID from Phase 1. You are ready for the part students find hardest: searching for a test date and center without getting blocked or forced into an expensive reschedule.
Phase 3 – Search Strategy for Dates, Centers, and At Home Slots
This is where the ETS site can feel “clunky.” Students click a month, see no seats, and assume everything is full. In reality, center availability changes by city, and at home availability is shown separately. You have to filter, zoom in, and sometimes change the radius. ETS itself says to use your ETS account to find where to test and to view/select available dates. [ Source: ETS Where to Test. (ETS) ]
Our goal in this phase is to find a date that does not force you to pay the ₹ 5,000 reschedule fee later and a location/mode that your ID is accepted in. [ Source: ETS Fees India. (ETS) ]
Step 11: Open “Register / Find Test Centers and Dates” from Your ETS Dashboard
After you sign in, click the GRE General Test and then select “Register / Find Test Centers and Dates.” If you chose at home in Phase 1, the portal will show you at home availability; if you chose test center, it will show you the map of centers near your location. [ Source: ETS Registration. (ETS) ]
- Enter your address/city exactly so ETS can list nearby centers.
- Select a date range that matches your application deadlines; don’t just pick the earliest date.
- If nothing shows: widen the radius or pick a different nearby city; seats can differ center-to-center inside the same metro.
Step 12: Compare “Test Center” Availability With “At Home” Availability
Some test takers overlook the fact that at home slots exist on days when test centers are full. If you prepared your device in Phase 1 and you meet room/camera rules, switching to at home can make you test earlier and avoid peak-center fees or travel. [ Source: ETS At Home Testing. (ETS) ]
- Check center first: if your preferred center has a slot that works with your university deadlines, take it.
- If center is full: switch the mode in the ETS finder to at home and check again.
- Keep the same name, same ID, same country as in earlier phases no matter which mode you end up picking.

Step 13: Pick the Date That Matches Your Score Reporting Timeline
Most test takers in Nov–Dec forget that scores are typically reported in 10–15 days after the test, and you can then send score reports to your four free recipients. So if your university deadline is Dec 31, don’t book a slot on Dec 28 unless the university accepts late or self-reported scores. [ Source: Prepscholar – Sending GRE Scores. (Prepscholar) ]
- Write the application deadline on your printed checklist.
- Count backward 15 days to find a safe test date.
- If you can’t find seats in that window, switch to at home or widen your center radius before paying the fee.
When these three steps in Phase 3 are done, you will have the safest possible slot and mode for your GRE. Now you can go to payment, add-ons, and the four free recipients without fearing a costly reschedule later.
Take a look at the full GRE syllabus 2026 and to align exam dates with your 30-day GRE study plan if you only have a month of prep left.
Phase 4 – Add-Ons, Free Score Recipients & What to Skip
This is the money-saving part. ETS slips in small upsells and gives you one big benefit: sending scores to up to four recipients for free right after the test. If you ignore that moment, you later pay per additional score report. Doing this step in the right order is how advisors save their students a few thousand rupees or tens of dollars. [ Source: ETS – Send GRE Scores. (ETS) ]
Step 14: Enter Your 4 Free Score Recipients in the Right Spot
You already prepared these four in Phase 1. Now you just have to enter them. ETS will show you a list of institutions and fellowship sponsors, and you pick them by name or code. Once you submit them, your scores will be sent automatically after the test, for free. [ Source: ETS – Approved Score Recipients. (ETS) ]
- Search by institution name exactly as the university lists it. If the university has multiple campuses or grad schools, pick the correct one.
- Confirm the department/program if ETS asks, because some schools route GRE scores centrally while others need the exact program. If you don’t know, pick the main grad admissions option.
- Double-check all 4 recipients before you move to payment. This is your free window. [ Source: ETS – Send Scores. (ETS) ]
If you’re a student applying to US grad schools, add a note on your printout to match the programs you listed in their SoP, and check GRE score reporting guide so you can see how to send later reports.
Step 15: Review Optional Prep / Value-Adds, Then Skip What You Don’t Need
ETS and other providers sometimes show you official prep, practice tests, and coaching products during or after registration. These are quality products, but they are not required to complete registration. If your goal is to complete the booking and keep the total to the test fee only, you can safely skip these and use your own 60-day GRE study plan or 30-day GRE study plan instead.
- Say “no” to add-on prep if you already have third-party books or a coaching center guiding you.
- Say “no” to extra score reports at this stage, because you haven’t even tested yet.
- Say “yes” only to items your counselor or university specifically asked you to purchase.
Step 16: Apply Fee Reduction / Waiver If You Qualify (Before Paying)
ETS has a GRE Fee Reduction program for test takers with demonstrated financial need, and it requires action before registration because you must receive the voucher first. If you are in the US or studying there, or your college counselor in India has an arrangement through ETS to distribute vouchers, do that part before paying, not after. [ Source: ETS – Reducing Barriers for Test Takers. (ETS) ]
- Check eligibility with ETS or your institution.
- Get the voucher/code issued in your name.
- Apply it during payment so you don’t have to request refunds or changes later.
Check GRE fee waiver so that you can self-qualify before proceeding.
Step 17: Make Payment With a Method That Can Be Reused for Reschedules
Sometimes students pay using someone else’s card and then can’t reschedule themselves because the bank blocks a later charge. Using your own internationally enabled card or a parent’s card that you can access again makes rescheduling or rebooking smoother. ETS says rescheduling and changing test centers is allowed up to 4 days before the appointment (local test center time) but with a fee, so you must be able to pay that fee. [ Source: ETS – Reschedule Policy. (ETS) ]
- Use a card you control or can get OTPs for.
- Save the receipt immediately as PDF or screenshot.
- Attach the receipt to the printed checklist this article is based on.

Phase 5 – After-Registration Safeguards & Day-Of Proofs
Most students think they are “done” after payment, but test day problems almost always come from this last stage: they can’t find the confirmation email, their name prints wrong on the admission ticket, or they show up at center without the right ID. This phase cleans all of that up.
Post-Registration Checklist (Do Immediately)
- Download/print the confirmation from your ETS account and keep it in the exam folder.
- Verify test date, time zone, and mode on the confirmation — especially important for at home GRE because you might book a slot shown in a different local time. [ Source: ETS – Test Day. (ETS) ]
- Cross-check name and ID one more time: do they match exactly, including middle names and order?
If You Booked “GRE General Test at Home”
Do one more environment check. The proctor can stop your test if you don’t meet equipment, room, or clothing rules, even if your payment and schedule are fine. ETS says your environment must meet specific requirements and you must show it on camera. [ Source: ETS – At Home Test Day. (ETS) ]
- Set up in a quiet, private room with a desk and chair.
- Keep only allowed items on the desk (no phones, no notes unless permitted).
- Test your internet, camera, and mic again the day before.
If You Booked a Test Center
ETS requires you to arrive early, carry the correct ID, and follow local policies. Some centers have COVID or building-access rules; assume you may need a few extra minutes. [ Source: ETS – On Test Day. (ETS) ]
- Carry the same ID you used when you created the ETS account and registered.
- Arrive 30 minutes early to clear check-in and locker steps.
- Bring confirmation printout so there is no doubt about date/time.
Reschedule/Change-Center Contingency
Life happens. ETS allows rescheduling and changing test center, but it charges for it. In India this fee is ₹ 5,000, and you must finish the change at least 4 days before your test date, otherwise the fee can be higher or you may lose the entire test fee. So, if you see a clash with another exam, fix it early. [ Source: ETS – Fees India. (ETS) ]
- Log in to your ETS account and go to your upcoming GRE test.
- Click “Reschedule” or “Change Test Center” and follow the date picker.
- Pay the fee using the same or another valid card.
If you are working through a longer prep flow like a 90-day GRE study plan, note this new test date on your study calendar so that your practice tests line up with actual test day.
Print, Share, and Train Your Students/Advisees
This whole page was written to be turned into a one-pager or two-page PDF that university career centers, education consultants, and study-abroad agencies can hand to students who keep asking “How do I fill out the GRE form?” All 17 steps are in the right order, and each step has the link or decision needed.
- Print the checklist and write the student’s name, ID type, test mode, and preferred test date on top.
- Attach the ETS payment receipt and the 4 score recipients list to the same printout.
- Keep a digital copy in your student’s counseling folder so anybody in your office can answer follow-up questions.

FAQs
These are the 6 questions students and advisors ask most often when they try to register for GRE for the first time. Keep them attached to your printed checklist so you don’t have to re-explain ID rules or reschedule fees every week.
1. Can I register for the GRE without a passport?
It depends on the country where you are testing. ETS says you must present valid and acceptable identification on test day, and in many locations outside your country of citizenship, that means a valid passport with your name, photo, and signature. Some countries accept national IDs, but if you will test outside your country, a passport is the safest and often the only option. Always verify the ID rules for your test location before you pay. [ Source: ETS – Identification Requirements. (ETS) ]
2. What happens if the name on my ETS account doesn’t match my ID?
ETS is clear: the name on your ID and the name in your ETS account must match, or you may not be allowed to test and your test fee may be forfeited. That is why our checklist makes you copy the name from the ID in Phase 2. If you realize your name is wrong after registration, contact ETS and fix it well before test day. [ Source: ETS – Name Must Match. (ETS) ]
3. How early should I register?
Register as soon as you know your graduate school deadlines and the city or at home option you want. Seats can fill up in busy months, and ETS charges a fee for rescheduling or changing centers. If your program deadline is close, count backward 15 days from that date and pick the earliest slot that keeps that 15-day buffer. [ Source: Prepscholar – How to Send GRE Scores. (Prepscholar) ]
4. Can I change my GRE test date or center after paying?
Yes, ETS allows rescheduling and changing test centers, but there is a fee and a deadline. In India, for example, the reschedule or change-center fee is ₹ 5,000, and you must complete the change at least 4 days before the test date (local test center time). That is why this guide makes you finalize your mode and city in Phase 1 and Phase 3. [ Source: ETS – GRE Fees India. (ETS) ]
5. Where do I put my 4 free score recipients?
You add the 4 free score recipients during or right after your test, through your ETS account. If you skip it, you can still send scores later, but you will pay for each additional report. Add the universities or programs you collected in Phase 1, or go-to GRE score reporting guide so that you can make smart choices. [ Source: ETS – Send Scores. (ETS) ]
6. I’m short on money. Can I get a discount on GRE fees?
Some test takers can. ETS runs a fee reduction program for test takers who can show financial need or are part of certain programs. You must qualify and get the voucher before you pay your GRE fee. If you pay first and ask later, you may not get the reduction. Check GRE fee waiver so that you can self-check your eligibility. [ Source: ETS – Reducing Barriers for Test Takers. (ETS) ]
Wrap-Up: Keep This Checklist With Your GRE Folder
You now have the full 17-step sequence, in the right order, with ETS source links where rules can change. Keep the printed version in the same folder as your passport, payment receipt, and score recipient list. If you ever have to reschedule, you can repeat only Phase 3 and Phase 5 instead of doing the whole flow again.
Next, you should move from “I booked the test” to “I am ready for test day.” That means studying the current GRE syllabus 2026, building a fast 30-day GRE study plan if the test is soon, and reviewing GRE test day rules so you don’t bring restricted items.
Content Integrity Note:
This page was drafted with AI assistance and then organized, fact-checked, and aligned to GRE test-taker needs by Andrew Williams. Andrew Williams has 10 years of experience coaching GRE candidates who go on to top universities. Official rules and fees come from ETS and are cited inline above.